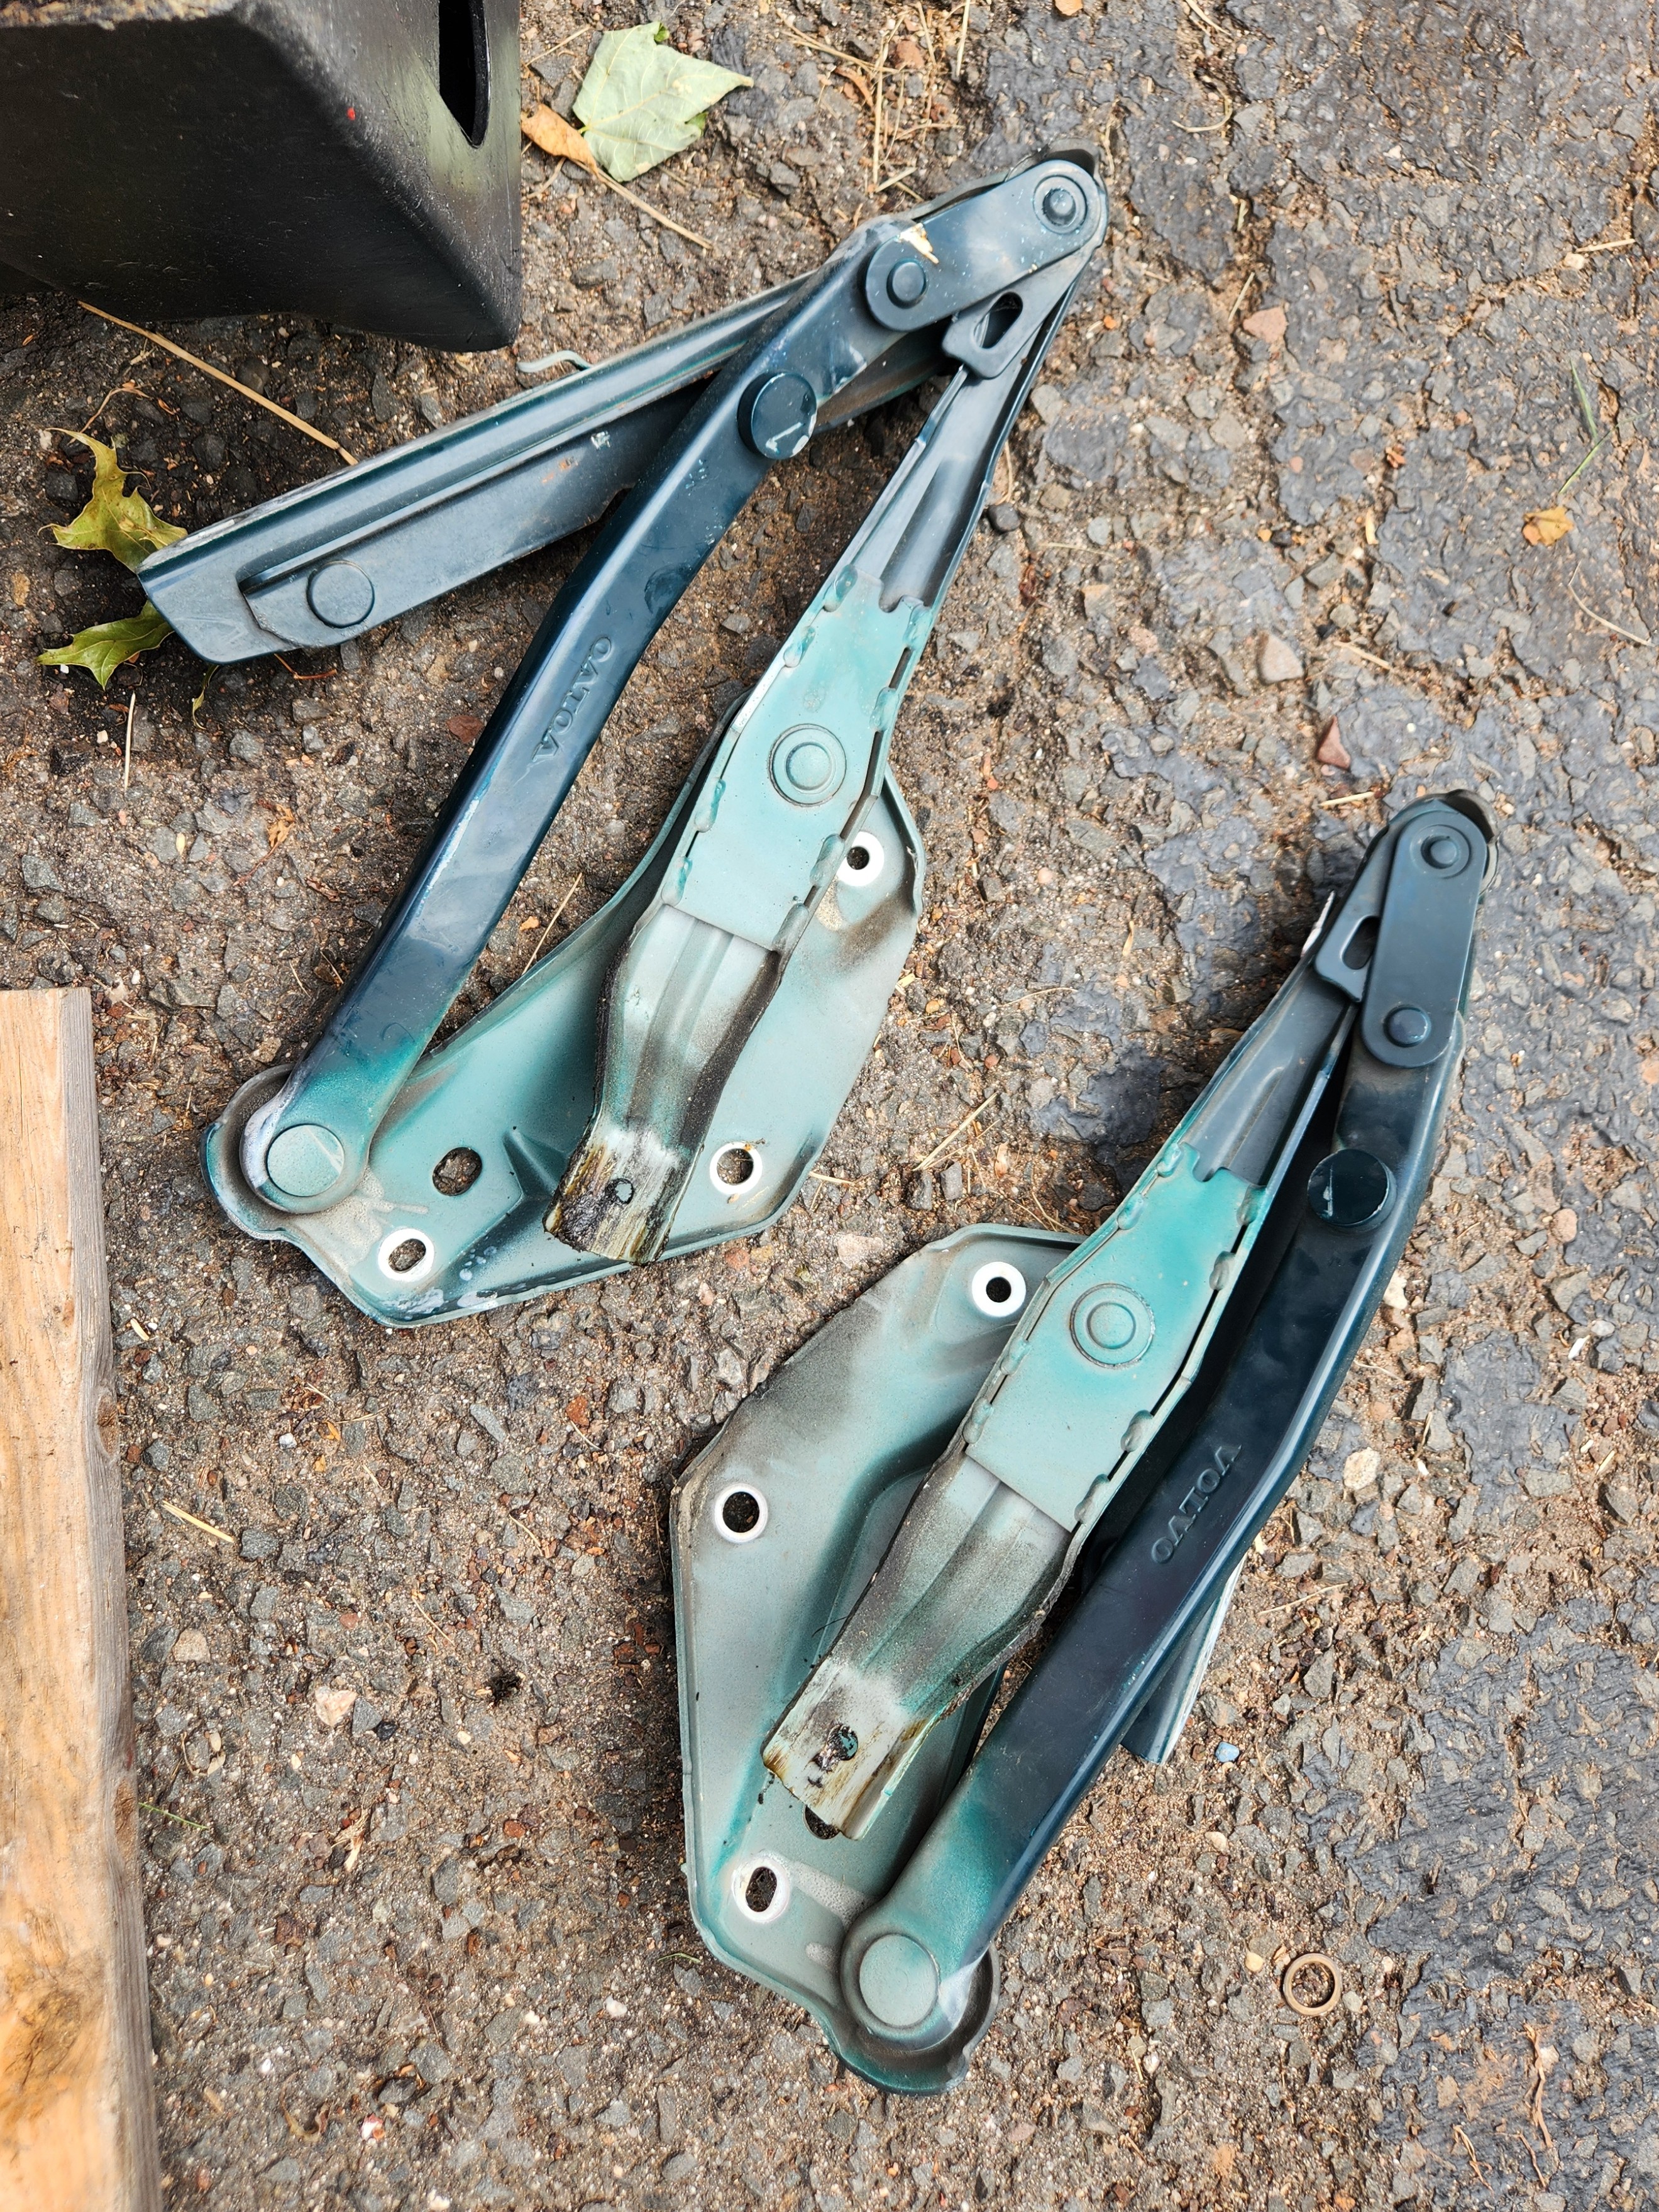
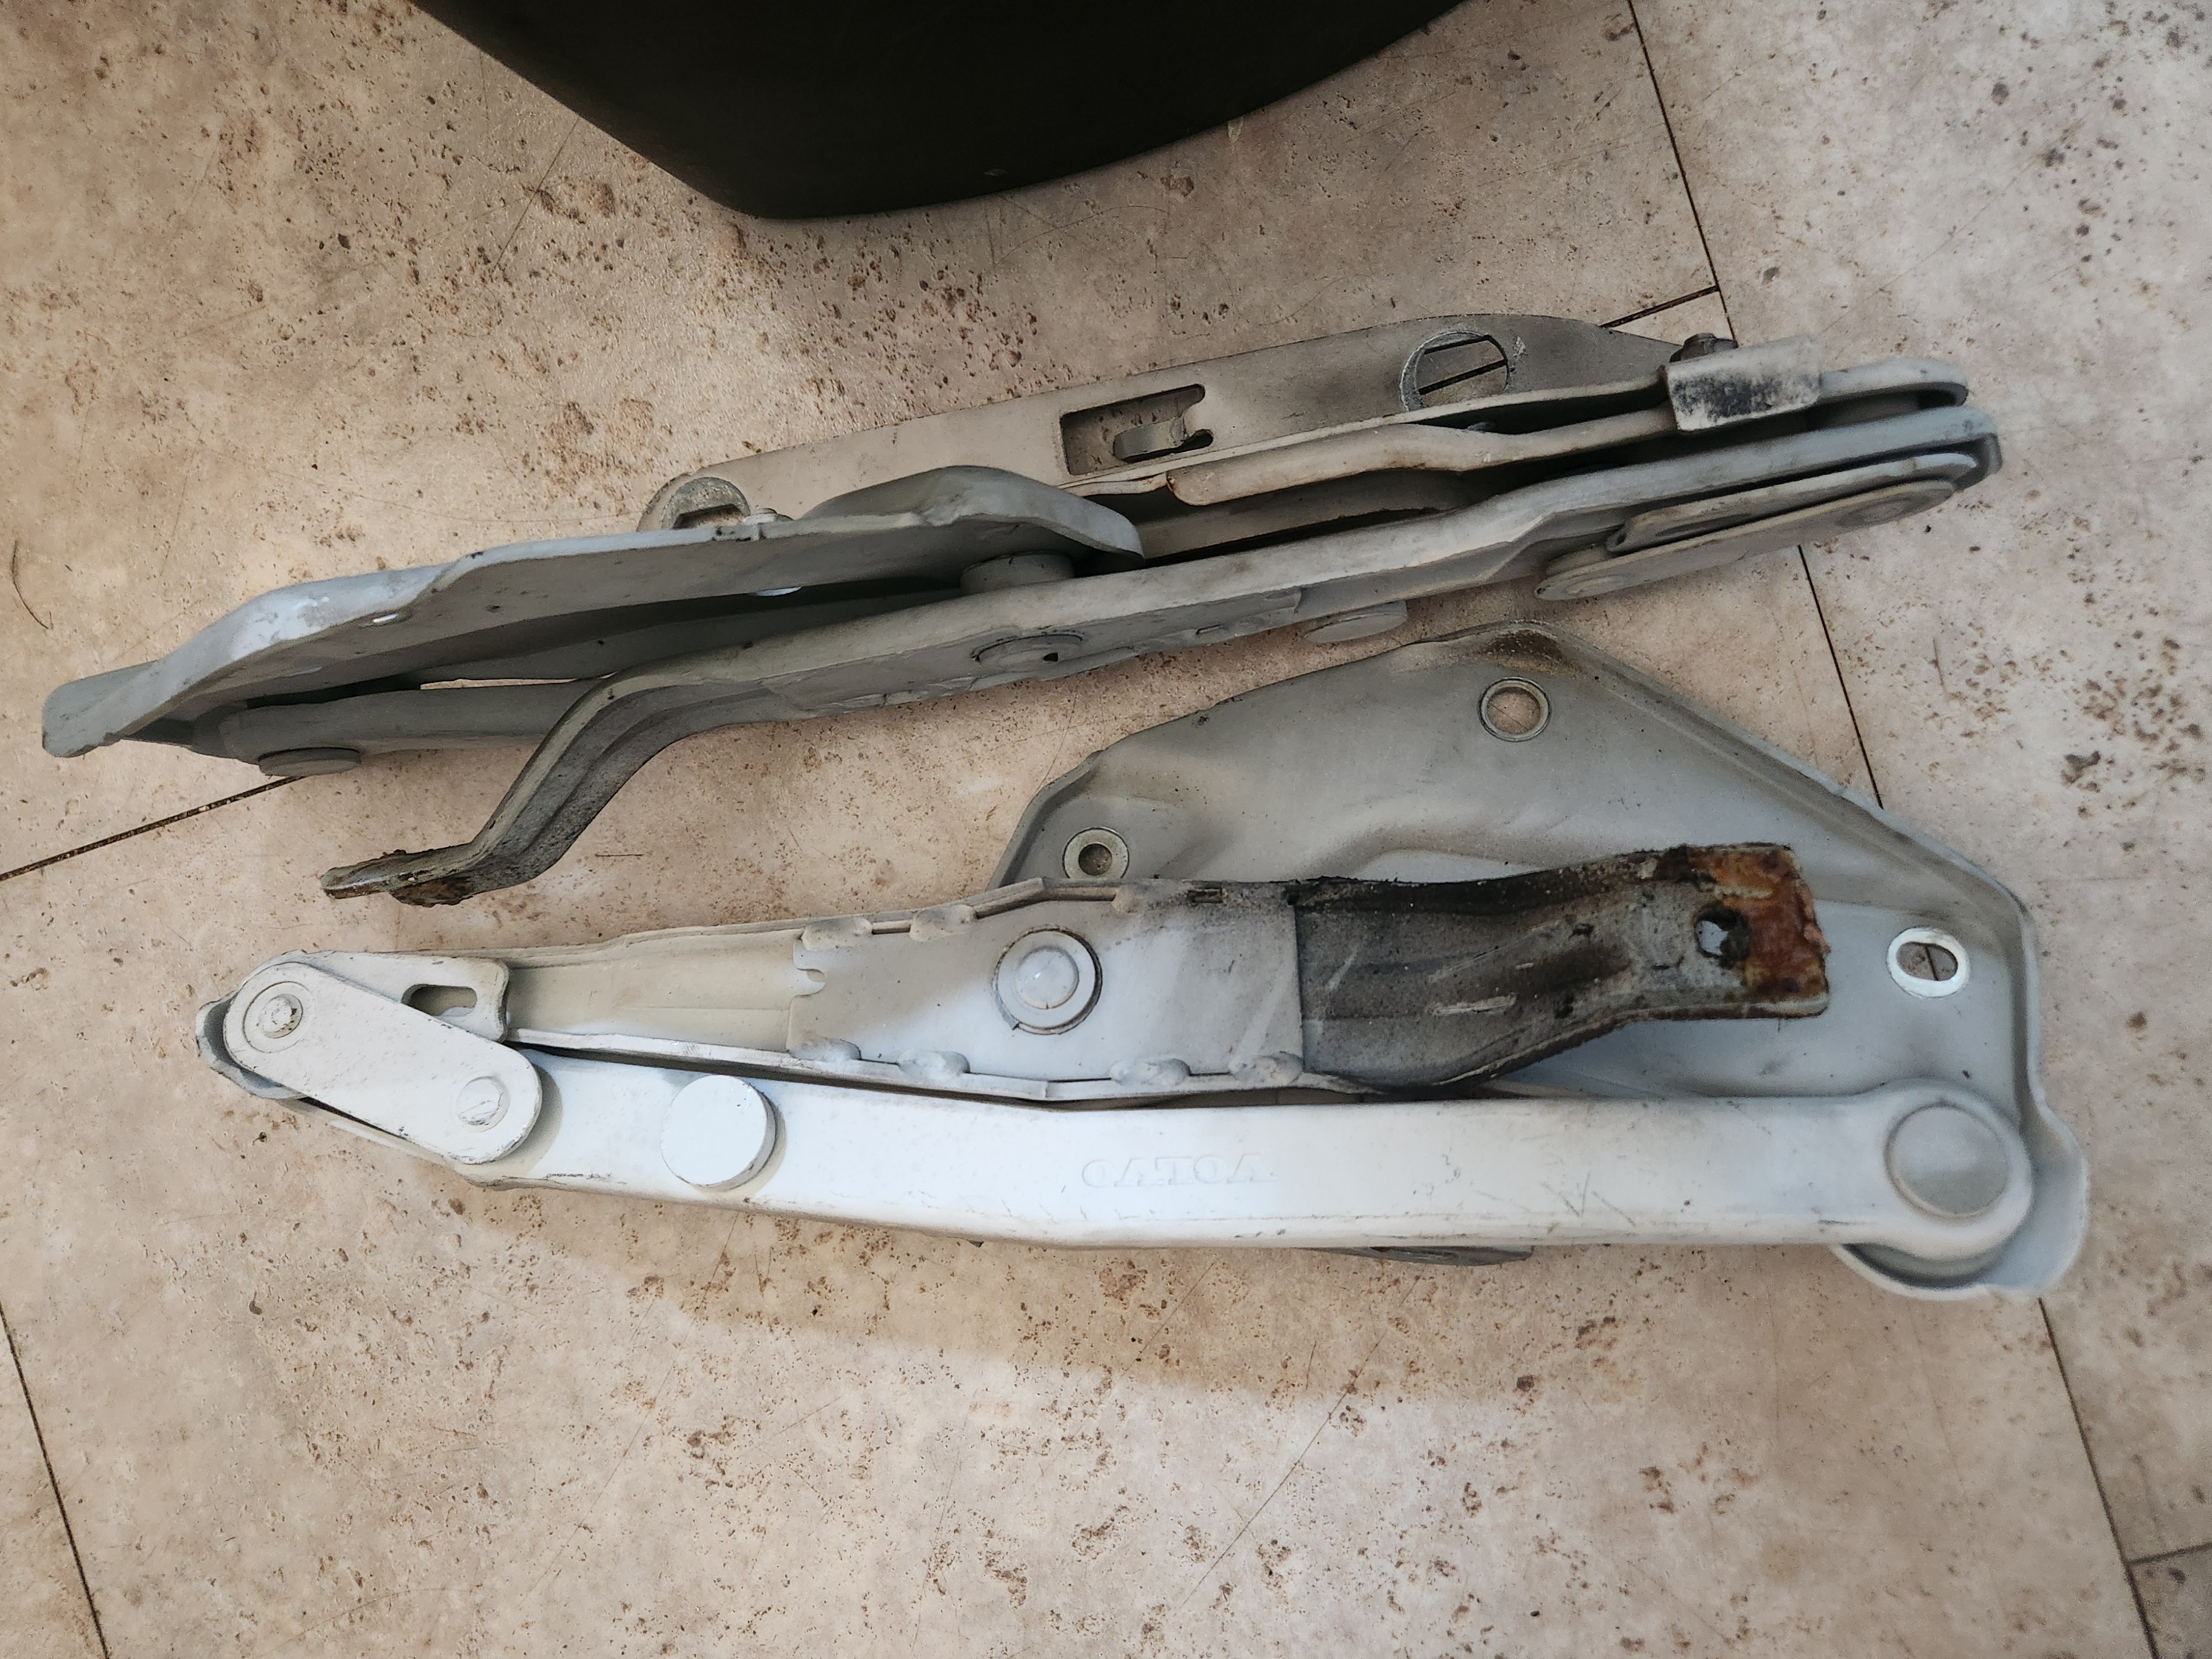
Hood Hinge Replacement ('94 850)
How did we get here?
Did you take the car for a test drive after finishing a bunch of work? Did you forget that your hood latches are old and slightly misaligned from the Mystery Front-End Impact that (we can only presume) doomed your car to the auction house? Did you give it a little gas? Did the hood fly up and go BONK? Did you feel like an idiot?
Does your hood still close?
Failure mode
The hood flying open and coming to an abrupt stop briefly deformed the whole sheet of metal, which pulled on the hinge linkages. They weren’t designed to handle that kind of lateral force, so the weakest parts bent and twisted.
Hood, springs and windshield all survived. Hinges were toast. I was a bit startled.
Re-aligning the bent bits was not possible without removal. Bench work would’ve required purchase of an oxy-acetylene torch. It was in my best interest to put this whole thing behind me and not think too hard about it, so I decided to buy some hinges from a guy I know who has a yard full of Volvos.
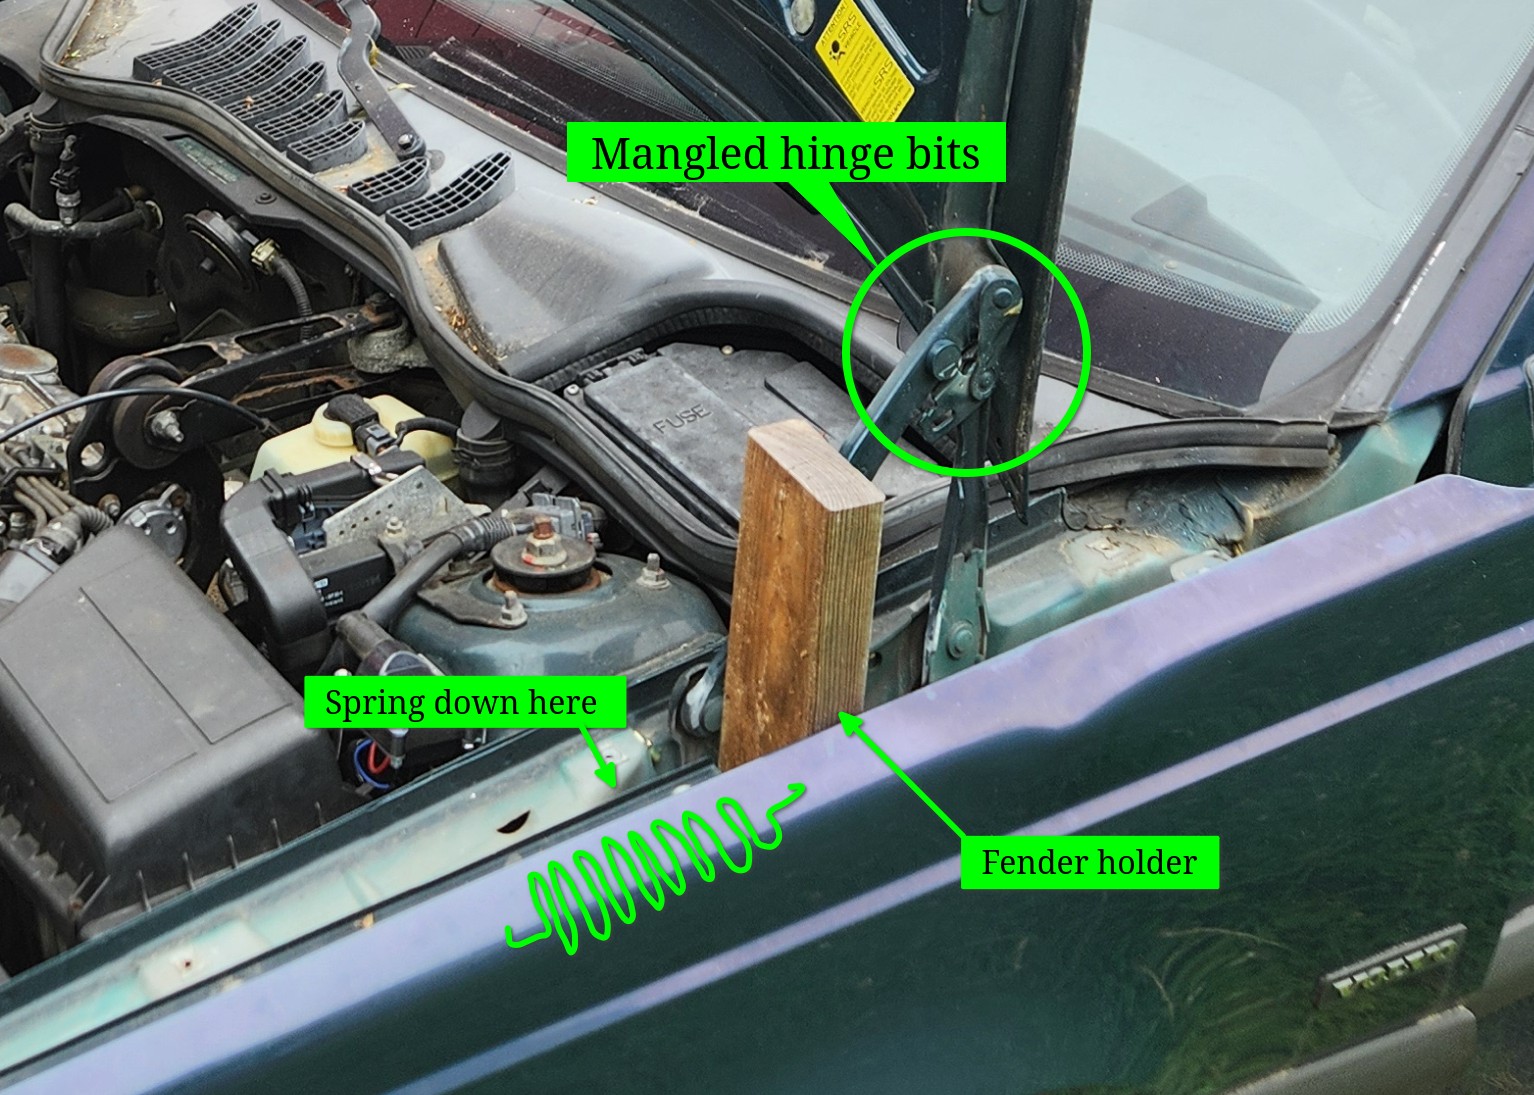
Figure 1: Work area overview
Why springs?
Instead of a heavy, useless hood that makes you lift it with your noodle arms (humiliating) Volvo put huge scissor hinges under the fenders and equipped them with some BEEFY springs.
The springs are under tension when the hood is closed, and relaxed when open. It’s a nice little balancing act - the hood floats upwards at the lightest touch and there’s plenty of leverage to make closing it easy.
Let’s fix it!
Here are the steps:
- Access, shim and remove the springs
- Remove the hood
- Remove the hinges
- Reassmble in reverse
1. Access, shim and remove the springs
Start by removing the front fenders. If you’re lazy, you can unbolt them at the top and use some lumber to wedge open enough space to work. See figure 1.
To get the spring and hinge assemblies out, the hood should be removed (unless you can support the entire hood assembly from above with a hoist or crane). To remove the hood, the springs need to be held open. Why?
Removing the hood removes the counterweight. The springs would contract to the maximum degree possible (hinges open). The springs simply hook into openings on the hinge assembly and body work, but since they need to not fall out all the time, they’re installed under tension. This is only a little tension relative to the whole assembly, but for a human it’s a lot to overcome. Think about parking brake springs: do you want to try doing that with a spring ten times larger?
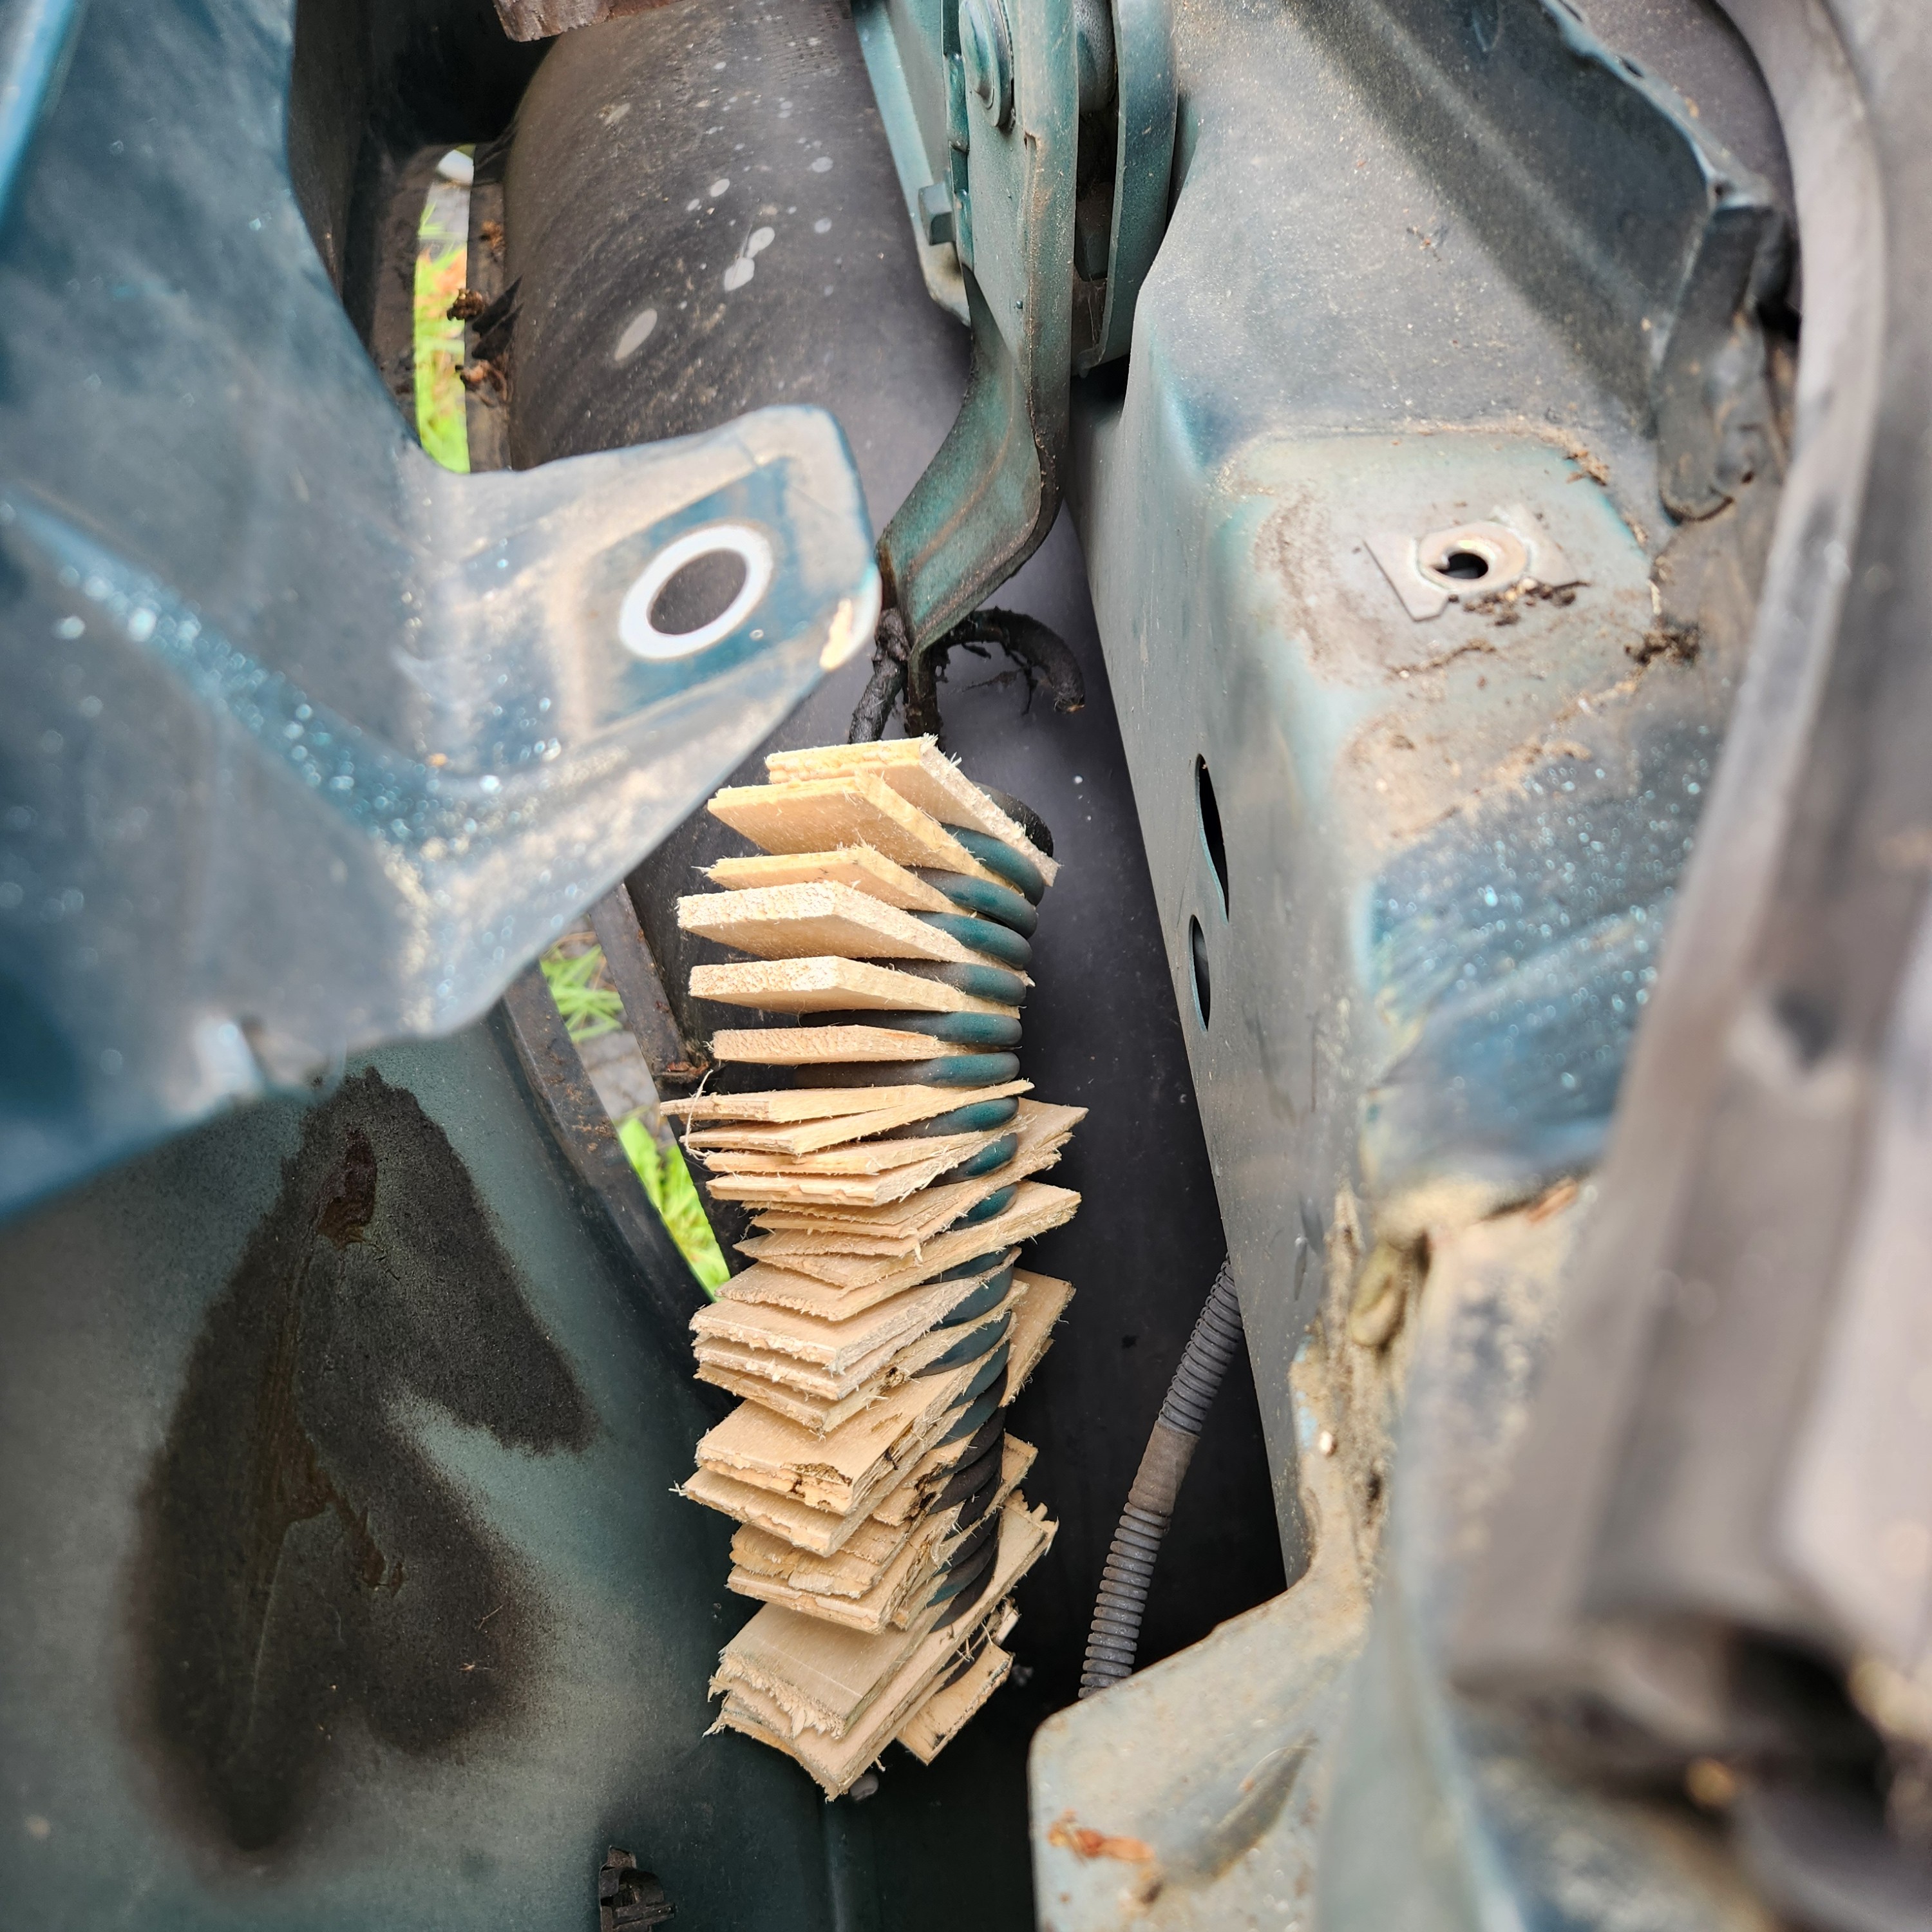
So we’re going to open the hood partway, and jam wood shims in between the spring coils, thus holding it under tension and making it longer. Now we get two nice effects:
- Hinges won’t return to relaxed/open position when counterweight (hood) is removed
- Springs will be easily removable and reinstallable
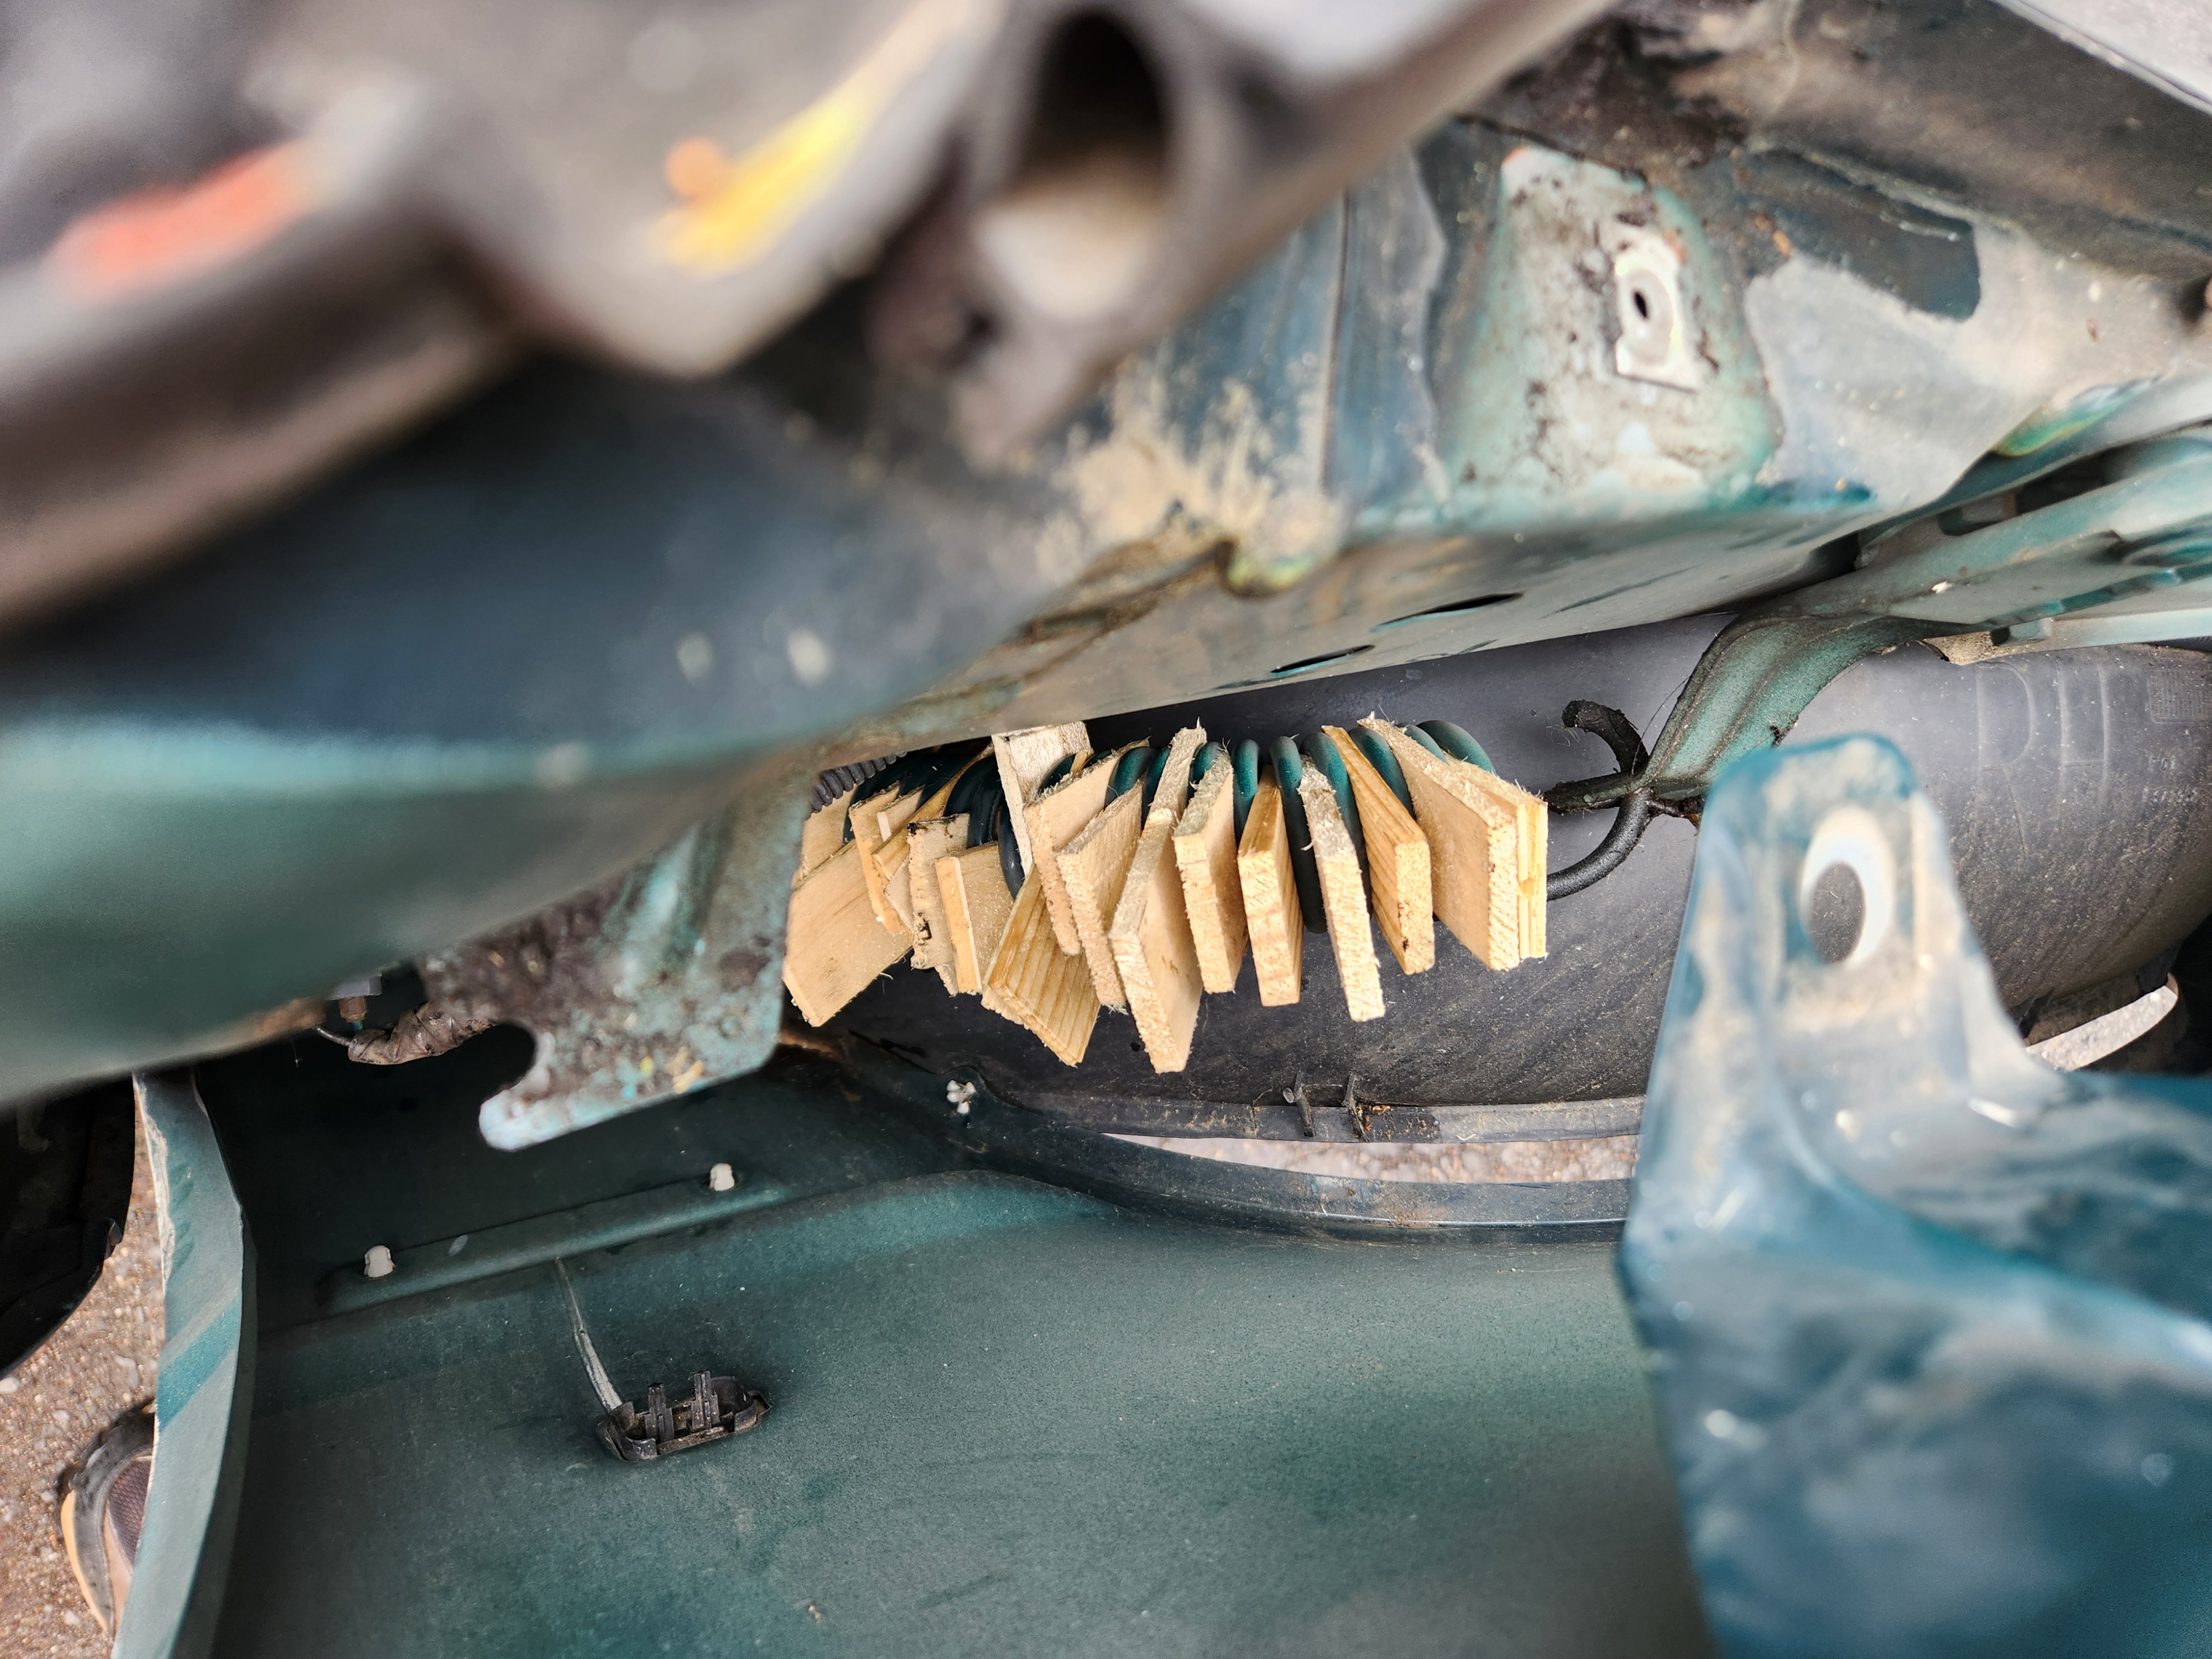
Driver-side spring with shims
Once you’ve filled the spring with shims, get a helper. Have them manipulate the hood. Open the hood slightly further and you will be able to unhook the springs. Note their orientation and set them to the side.
The hardest part is done!
2. Remove the hood
The hood is now dead weight. Slacken the bolts holding it to the hinges and, with a helper, carefully remove the hood. Set it to the side.
3. Remove the hinges
The hinge assemblies bolt directly to the body. Access is easy. Remove the bolts and the hinges. On my car, there was RTV sealing the interface which had to be removed. I removed it and applied new RTV. I’m not sure why it’s there - maybe to inhibit water retention and corrosion at the interface?
4. Reassemble
Install the new hinges. Close the hinges partway and reinstall the hood with your helper. Reinstall the springs. Test the hood alignment and latch mechanism. Reinstall the fenders.